前言
复习一下Redis的部署和应用,并记录了下来!
一、下载Window版本的redis
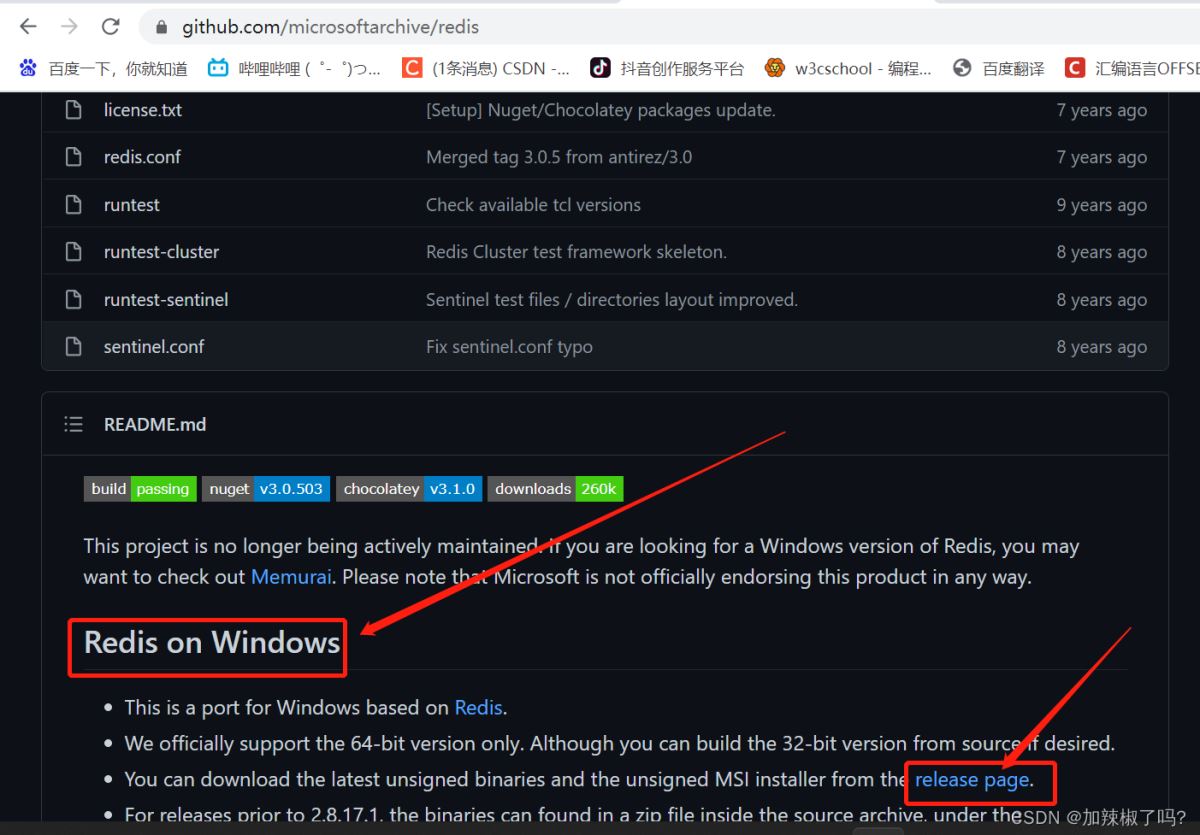
1.打开网址:github上的redis安装包,找到Redis on Windows,点击 release page。
2.选择你要下载的版本,点击安装程序进行下载
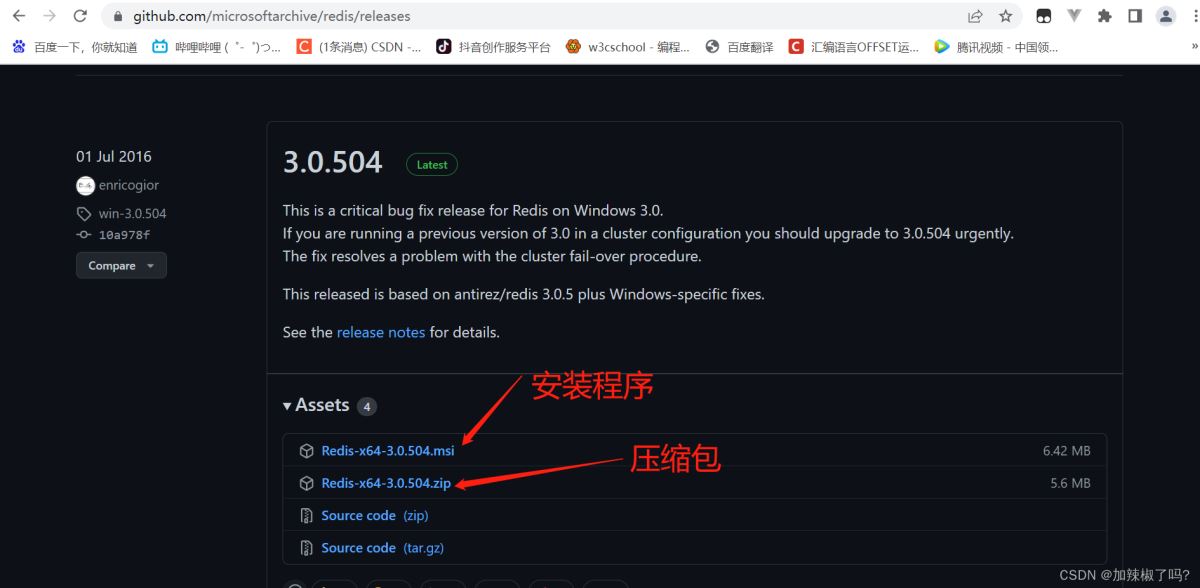
3.安装 一直点 下一步 直至完成安装就行,注意自己的安装目录(下面的配置环境变量要用到,我自己的路径是D:Redis)
二、配置环境变量
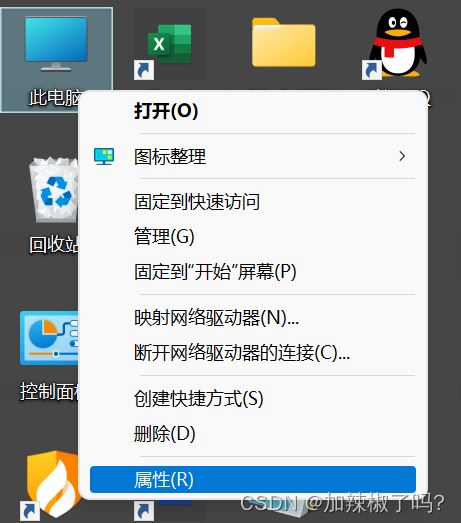
1.右击我的电脑,选择属性
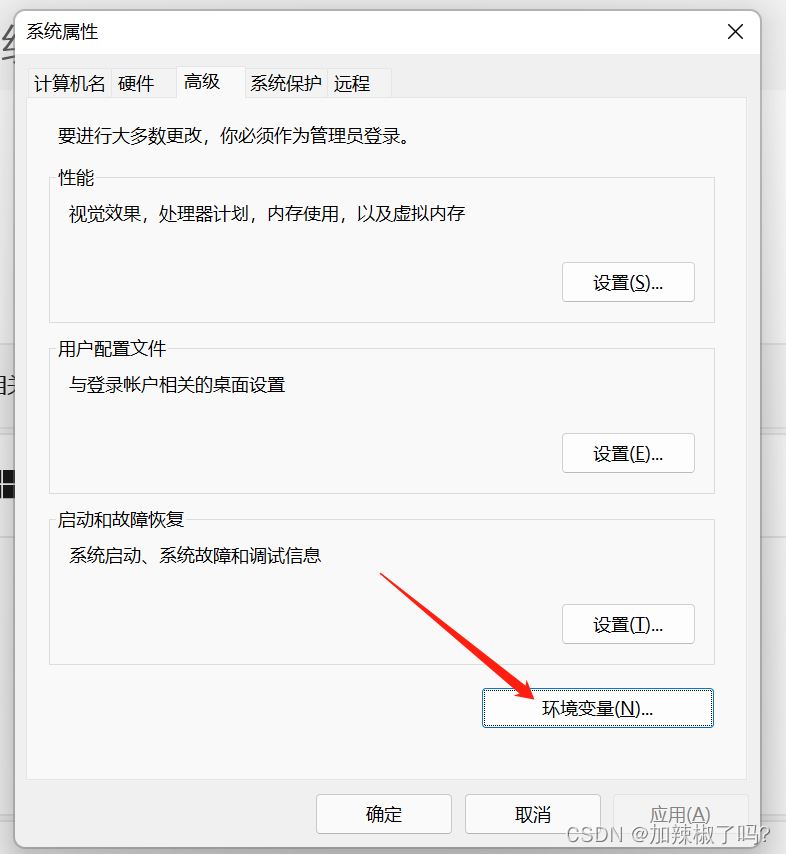
2.点击 高级系统设置 ,我这是win11系统,你们自己找哈!

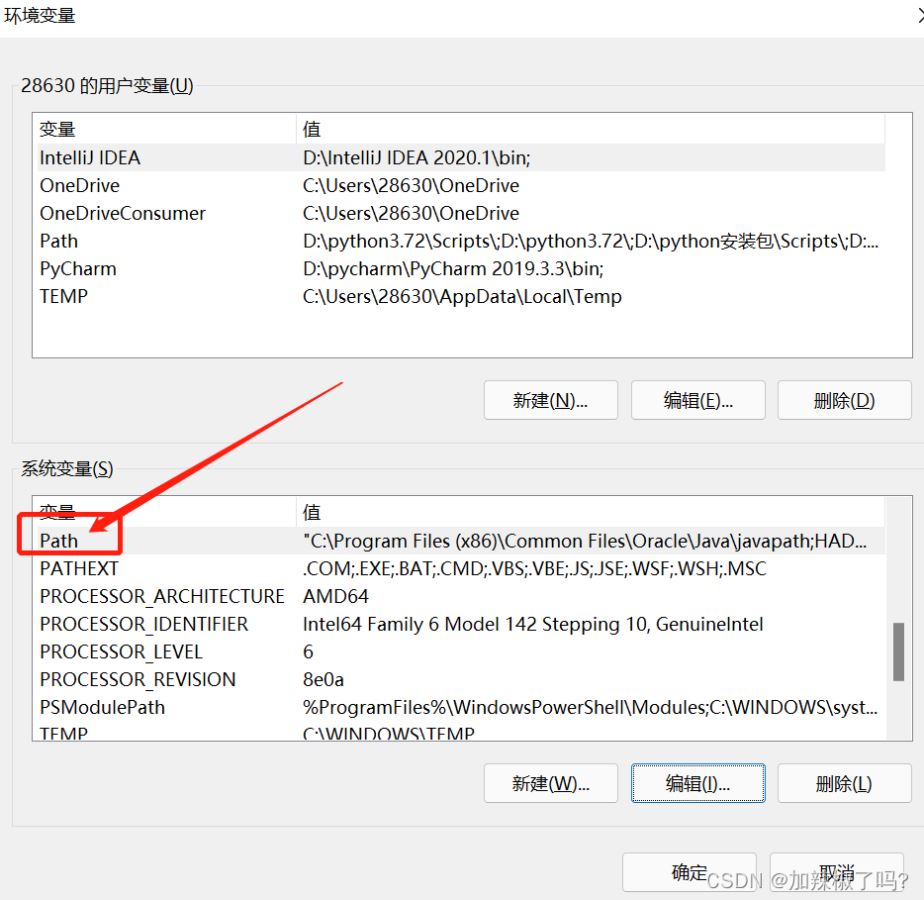
3.点击环境变量
4.双击Path
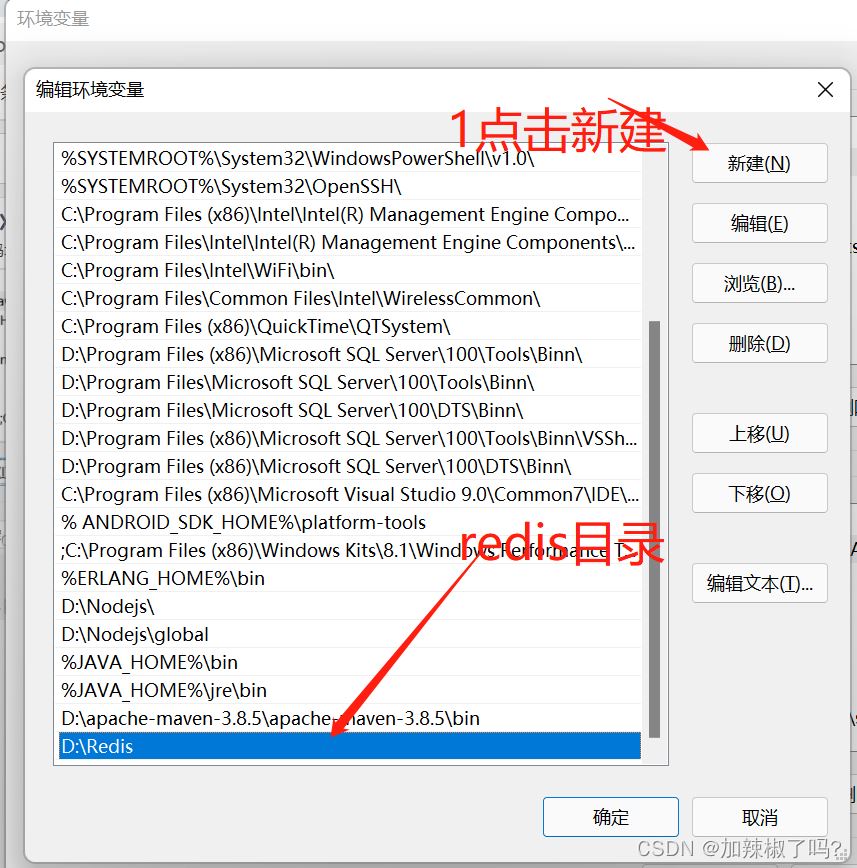
5.点击新建,把安装redis的对应目录写进去,然后确定。
6.点击win+R,输入cmd

7.输入命令redis-cli,连接成功!

到这里redis部署就完成了!!!下面是redis在idea里面的应用! 三、redis在idea的应用 1.打开pom.xml文件,引入redis架包,代码如下

代码如下:
org.springframework.bootspring-boot-starter-data-redis
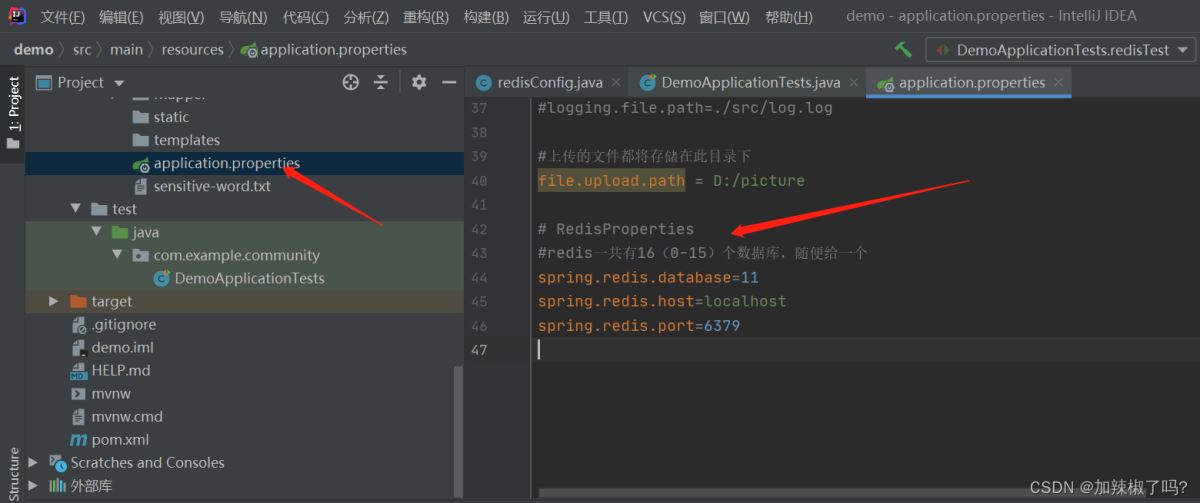
2.打开application.properties配置文件,写入redis的相关配置
代码如下:
# RedisProperties
#redis一共有16(0-15)个数据库,随便给一个
spring.redis.database=11
spring.redis.host=localhost
spring.redis.port=6379
3.新建一个配置类redisConfig.java文件,代码如下
package com.example.community.config;

import org.springframework.context.annotation.Bean;
import org.springframework.context.annotation.Configuration;
import org.springframework.data.redis.connection.RedisConnectionFactory;
import org.springframework.data.redis.core.RedisTemplate;
import org.springframework.data.redis.serializer.RedisSerializer;

/**
 * @ClassName redisConfig
 * @Description TODO
 * @Author 加辣椒了吗?
 * @Date 2022/4/28 2:33
 * @Version 1.0
 **/
@Configuration
public class redisConfig {
    @Bean
    public RedisTemplate redisTemplate(RedisConnectionFactory factory){
        // 将redis注入工厂
        RedisTemplate template = new RedisTemplate();
        template.setConnectionFactory(factory);

        // 设置key的序列化方式
        template.setKeySerializer (RedisSerializer.string());
        //设置value的序列化方式
        template.setValueSerializer (RedisSerializer.json());
        // 设置hash的key的序列化方式
        template. setHashKeySerializer (RedisSerializer.string());
        // 设置hash的value的序列化方式
        template.setHashValueSerializer (RedisSerializer.json());
        // 使设置生效
        template.afterPropertiesSet();

        return template;
    }
}
4.测试 在测试类里面添加测试方法,测试通过

代码如下:
package com.example.community.config;

import org.springframework.context.annotation.Bean;
import org.springframework.context.annotation.Configuration;
import org.springframework.data.redis.connection.RedisConnectionFactory;
import org.springframework.data.redis.core.RedisTemplate;
import org.springframework.data.redis.serializer.RedisSerializer;

/**
 * @ClassName redisConfig
 * @Description TODO
 * @Author 加辣椒了吗?
 * @Date 2022/4/28 2:33
 * @Version 1.0
 **/
@Configuration
public class redisConfig {
    @Bean
    public RedisTemplate redisTemplate(RedisConnectionFactory factory){
        // 将redis注入工厂
        RedisTemplate template = new RedisTemplate();
        template.setConnectionFactory(factory);

        // 设置key的序列化方式
        template.setKeySerializer (RedisSerializer.string());
        //设置value的序列化方式
        template.setValueSerializer (RedisSerializer.json());
        // 设置hash的key的序列化方式
        template. setHashKeySerializer (RedisSerializer.string());
        // 设置hash的value的序列化方式
        template.setHashValueSerializer (RedisSerializer.json());
        // 使设置生效
        template.afterPropertiesSet();

        return template;
    }
}
或者
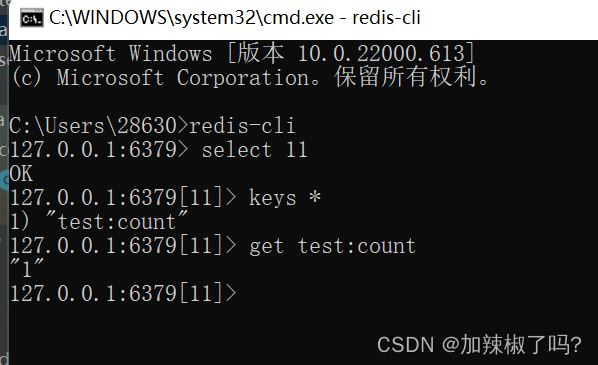
打开redis控制台,输入以下命令,测试通过!
总结
到此这篇关于Redis下载部署并加入idea应用的文章就介绍到这了,更多相关Redis下载部署内容请搜索IT俱乐部以前的文章或继续浏览下面的相关文章希望大家以后多多支持IT俱乐部!

