前序
使用PdfSharpCore请注意使用XGraphics基类,与System.Drawing 的Graphics类似,XGraphics 提供XColor(颜色)、XPen(画笔)、XBrush(画刷)、XFont(字体)、XPoint(位置)等对象。提供很多画线,矩形,圆,扇形,多边形,图,文本等方法。源码请查看https://github.com/ststeiger/PdfSharpCore/blob/master/PdfSharpCore/Drawing/XGraphics.cs
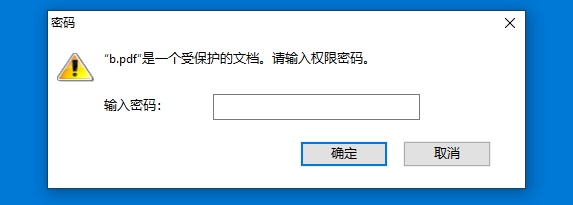
1.设置PDF拥有者的密码,让PDF防篡改。
代码很简单设置PdfDocument.SecuritySettings.OwnerPassword
            PdfDocument doc = PdfReader.Open(@"a.pdf", PdfDocumentOpenMode.Modify);
            doc.SecuritySettings.OwnerPassword = "123";
            var filePath = $"b.pdf";
            doc.Save(filePath);
2.PDF添加页眉和页脚
(1)添加页码显示
XStringFormats 指定文本的位置:详请查看https://github.com/ststeiger/PdfSharpCore/blob/master/PdfSharpCore/Drawing/XStringFormats.cs
XFont font = new XFont("SimHei", 8);
            XBrush brush = XBrushes.Black;
            PdfDocument doc = PdfReader.Open(@"a.pdf", PdfDocumentOpenMode.Modify);
            for (int i = 0; i

(2)添加页眉
XFont font = new XFont("SimHei", 8);
            XBrush brush = new XSolidBrush(XColor.FromArgb(128, 255, 0, 0));
            XPoint point = new XPoint(90, 20);
            PdfDocument doc = PdfReader.Open(@"a.pdf", PdfDocumentOpenMode.Modify);
            for (int i = 0; i

(3)添加页脚
XFont font = new XFont("SimHei", 8);
            XBrush brush = new XSolidBrush(XColor.FromArgb(128, 255, 0, 0));
            PdfDocument doc = PdfReader.Open(@"a.pdf", PdfDocumentOpenMode.Modify);
            for (int i = 0; i

3.PDF添加水印文字
XFont font = new XFont("SimHei", 8);
            XBrush brush =new XSolidBrush(XColor.FromArgb(128, 255, 0, 0));
            PdfDocument doc = PdfReader.Open(@"a.pdf", PdfDocumentOpenMode.Modify);
            for (int i = 0; i

4.PDF 添加图片
//第一步先加载PDF文件
            PdfDocument doc = PdfReader.Open(@"a.pdf", PdfDocumentOpenMode.Modify);
            //导入图片(地址,文件流)
            var background = XImage.FromFile(@"QRCode.png");
            // var background = XImage.FromStream(()=> stream);
            //指定PDF 的页
            PdfPage page = doc.Pages[0];
            var gfx = XGraphics.FromPdfPage(page, XPageDirection.Downwards);
            //写入指定位置
            gfx.DrawImage(background, 20, 20, 250, 140);
            doc.Save("b.pdf");
docker 模式,需要在 dockerfile 中添加如下配置
RUN apt-get update && apt-get -y install libfontconfig1
如需要指定字体,请将字段文件进行拷贝(比如雅黑)
COPY /xx/xxx/SIMHEI.TTF /usr/share/fonts/SIMHEI.TTF
总结
到此这篇关于.net core利用PdfSharpCore操作PDF实例的文章就介绍到这了,更多相关.net core用PdfSharpCore操作PDF内容请搜索IT俱乐部以前的文章或继续浏览下面的相关文章希望大家以后多多支持IT俱乐部!

