SpringBoot整合缓存
注解介绍
@EnableCaching
- 标记在CacheManager统一配置类
- 需要配合@Configuration使用
@Cachable
- 标记在需要使用缓存的实现类上,一般用于查询操作。
- 当该方法输入参数对应的缓存数据不存在与缓存引擎中(类似Redis)时,则会自动生成相关缓存;若存在则直接获取缓存结果。
@CachePut
- 标记在需要使用缓存的实现类上,一般用于更新操作。
- 无论如何都会执行方法逻辑,更新到缓存引擎中
@CacheEvict
- 标记在需要使用缓存的实现类上,一般用于更新操作。
- 直接清除该缓存
优缺点
- 优点:可以快速的应用缓存,不必要专业的中间件(例如:
CaffeineCache) - 缺点:无法精细的对缓存做业务处理,只能按照Spring整合缓存提供的逻辑执行(例如:
RedisCache)。
依赖
org.springframework.bootspring-boot-starter-web2.6.8com.github.ben-manes.caffeinecaffeine2.5.5org.springframework.bootspring-boot-starter-data-redis2.6.8redis.clientsjedis3.7.1
配置文件yml
spring:
  redis:
    host: 127.0.0.1
    port: 6379
整合Caffeine
步骤
1. 在自定义的CacheConfig中配置一个CaffeineCacheManager的@Bean
2. 在实现类中通过@Cachable进行标注(即表示使用哪个引擎CacheManager)
- 其中,value值对应图一中创建的缓存名称,cacheManager(必填)对应注入的
@Bean的名字, - 因为如果
CachesConfig中存在不同缓存引擎@Bean时(即多个CacheManager都来自一个接口),就会出现@Bean冲突的问题。 - 解决问题的关键就是使用
@Primary指定默认先加载哪个bean,或者就是当下的情况,直接指定cacheManager。
3. 测试缓存结果
代码
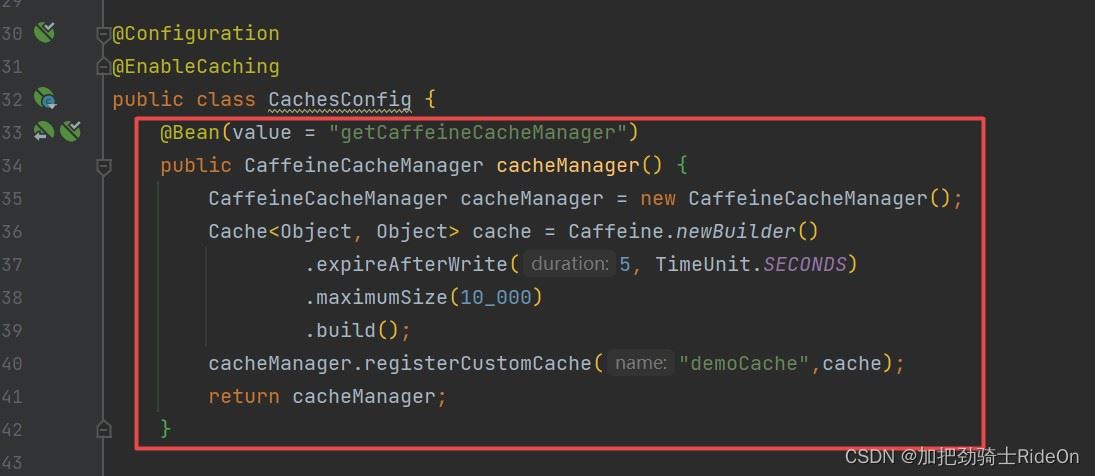
CachesConfig配置类
@Configuration
@EnableCaching
public class CachesConfig {
@Bean(value = "getCaffeineCacheManager")
public CaffeineCacheManager cacheManager() {
CaffeineCacheManager cacheManager = new CaffeineCacheManager();
Cache
CachesController控制层
@RestController
@RequestMapping(value = "cachesController")
public class CachesController {
@Autowired
private CachesService cachesService;
@Autowired
@Qualifier("getCaffeineCacheManager")
private CaffeineCacheManager caffeineCacheManager;
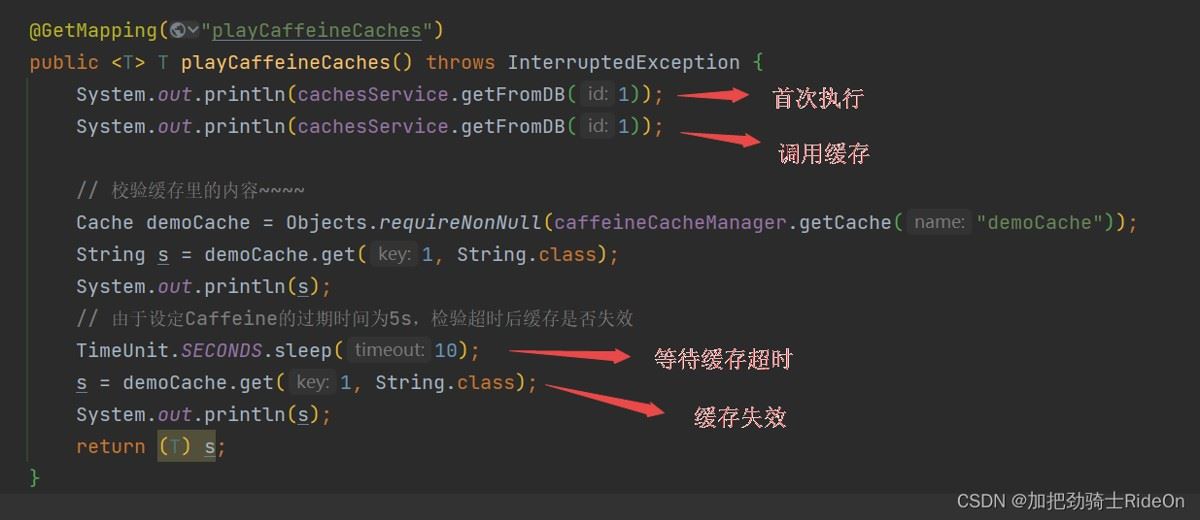
@GetMapping("playCaffeineCaches")
public T playCaffeineCaches() throws InterruptedException {
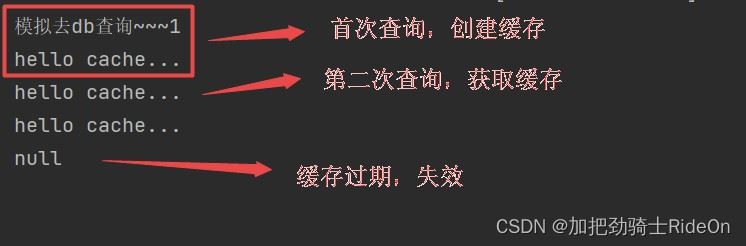
System.out.println(cachesService.getFromDB(1));
System.out.println(cachesService.getFromDB(1));
// 校验缓存里的内容~~~~
Cache demoCache = Objects.requireNonNull(caffeineCacheManager.getCache("demoCache"));
String s = demoCache.get(1, String.class);
System.out.println(s);
// 由于设定Caffeine的过期时间为5s,检验超时后缓存是否失效
TimeUnit.SECONDS.sleep(10);
s = demoCache.get(1, String.class);
System.out.println(s);
return (T) s;
}
}
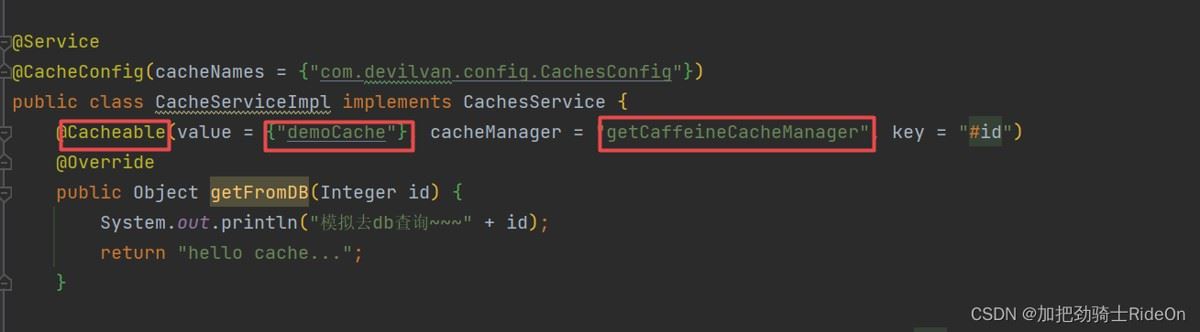
CacheServiceImpl实现类
@Service
@CacheConfig(cacheNames = {"com.devilvan.config.CachesConfig"})
public class CacheServiceImpl implements CachesService {
	@Cacheable(value = {"demoCache"}, cacheManager = "getCaffeineCacheManager", key = "#id")
	@Override
	public Object getFromDB(Integer id) {
		System.out.println("模拟去db查询~~~" + id);
		return "hello cache...";
	}
}
整合Redis缓存
步骤
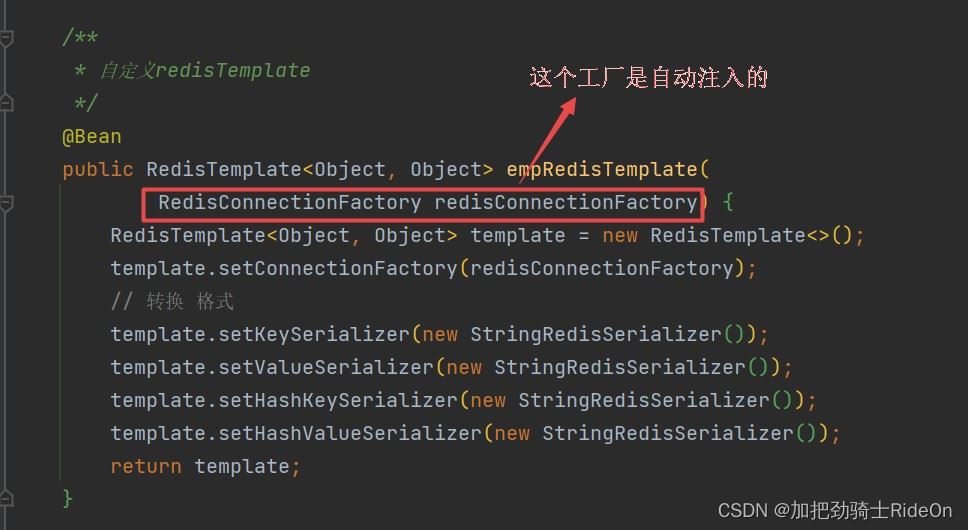
1. 定义一个RedisTemplate的@Bean
如果不添加其他信息直接注入一个也行
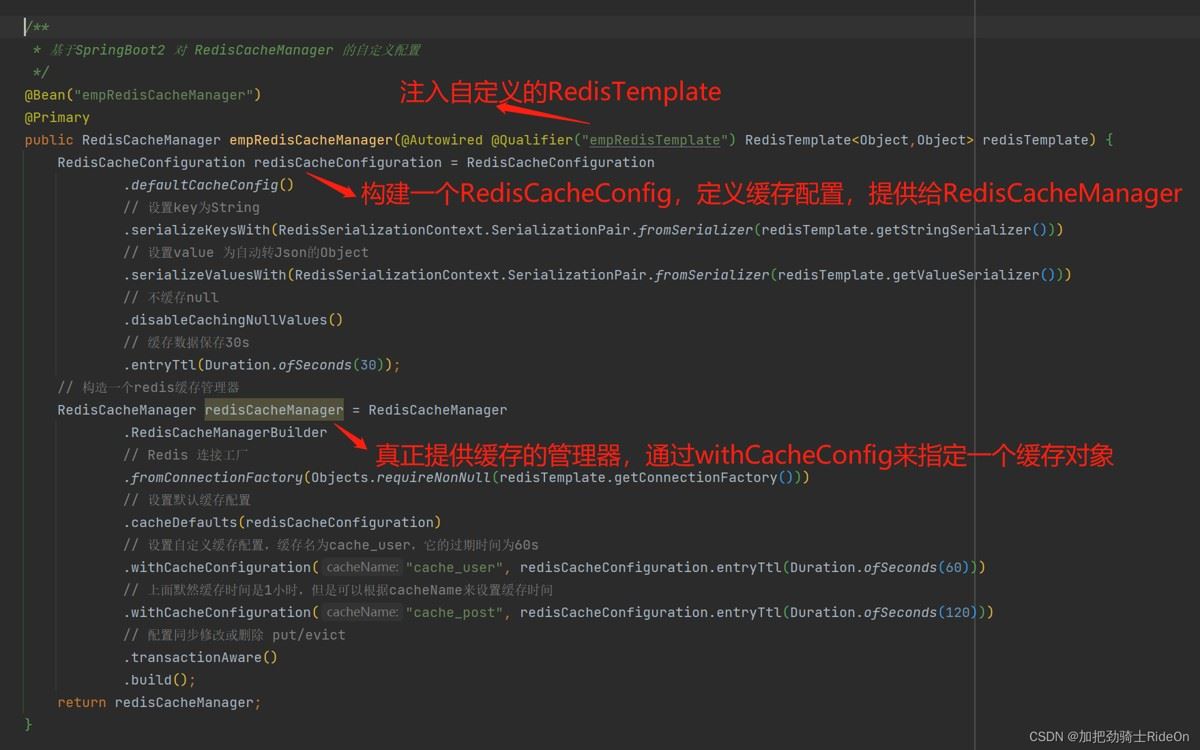
2. 在自定义的CacheConfig中配置一个RedisCacheManager
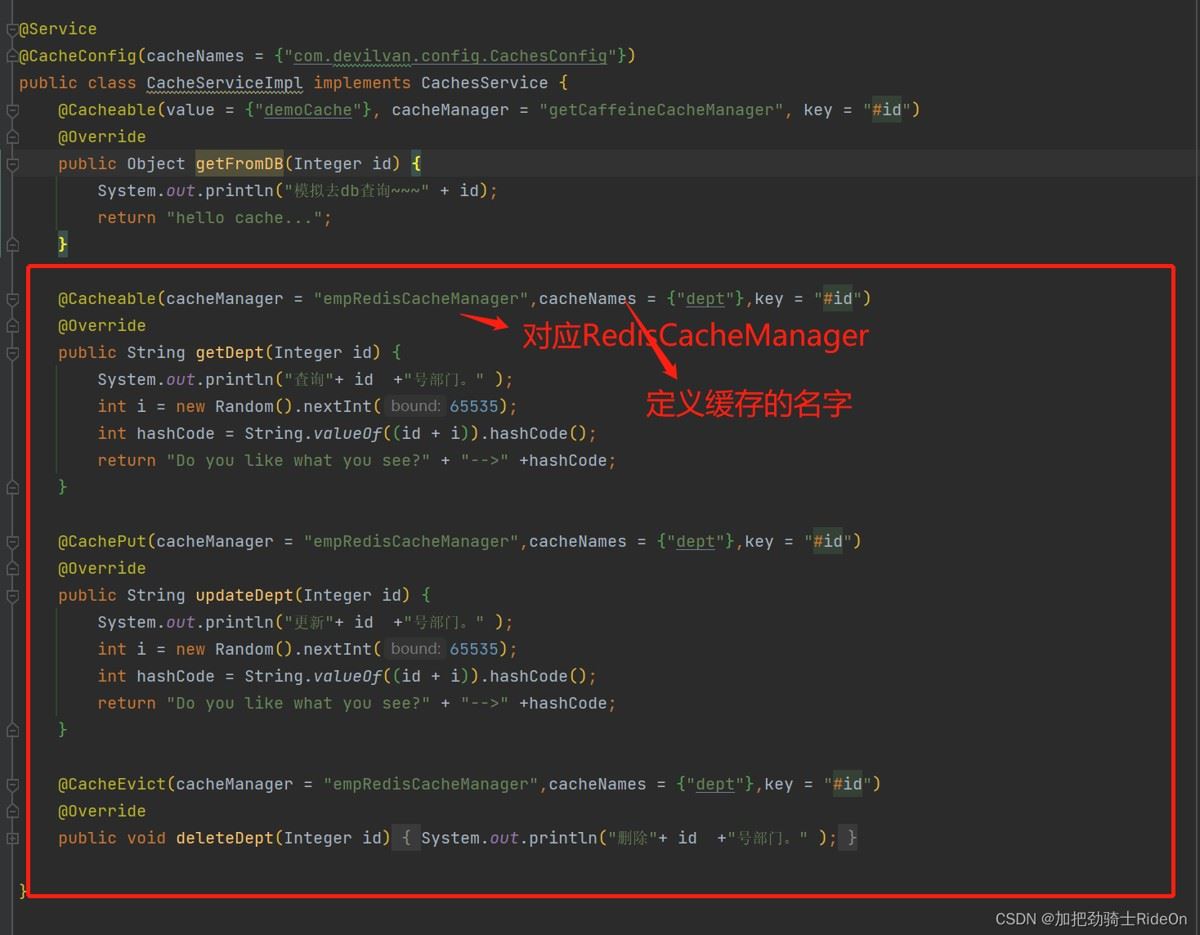
3. 在实现类中标记@Cachable、@CachePut、@CacheEvict注解,对应缓存的动作
参数
cacheManager
对应配置类中定义的缓存引擎@Bean,CacheManager的实现类
cacheNames
自定义缓存的名字,这里如果定的名字为上图中withCacheConfiguration()方法中的名字,则使用该方法参数中的配置
key
即缓存的对象ID,一般绑定方法参数,当key值在缓存中不存在时,执行逻辑并添加进缓存,存在则直接返回缓存的结果。
代码
CachesConfig配置类
/** * 自定义redisTemplate */ @Bean public RedisTemplate
CachesController控制层
@GetMapping("playRedisCaches")
public  T playRedisCaches(@RequestParam("id") Integer id) {
	System.out.println(cachesService.getDept(id));
	System.out.println(cachesService.getDept(id));
	return (T) null;
}

@PostMapping("updateRedisCaches")
public  T updateRedisCaches(@RequestParam("id") Integer id) {
	System.out.println(cachesService.updateDept(id));
	System.out.println(cachesService.getDept(id));
	return (T) null;
}

@DeleteMapping("deleteRedisCaches")
public  T deleteRedisCaches(@RequestParam("id") Integer id) {
	cachesService.deleteDept(id);
	System.out.println(cachesService.getDept(id));
	return (T) null;
}
CachesServiceImpl实现类
@Cacheable(cacheManager = "empRedisCacheManager",cacheNames = {"dept"},key = "#id")
@Override
public String getDept(Integer id) {
	System.out.println("查询"+ id  +"号部门。" );
	int i = new Random().nextInt(65535);
	int hashCode = String.valueOf((id + i)).hashCode();
	return "Do you like what you see?" + "-->" +hashCode;
}

@CachePut(cacheManager = "empRedisCacheManager",cacheNames = {"dept"},key = "#id")
@Override
public String updateDept(Integer id) {
	System.out.println("更新"+ id  +"号部门。" );
	int i = new Random().nextInt(65535);
	int hashCode = String.valueOf((id + i)).hashCode();
	return "Do you like what you see?" + "-->" +hashCode;
}

@CacheEvict(cacheManager = "empRedisCacheManager",cacheNames = {"dept"},key = "#id")
@Override
public void deleteDept(Integer id) {
	System.out.println("删除"+ id  +"号部门。" );
}
总结
以上为个人经验,希望能给大家一个参考,也希望大家多多支持IT俱乐部。

