注:使用的视频为mp4,转换成.m3u8播放列表和.ts切片文件
1、安装FFmpeg
我这边是通过Nux Dextop仓库来安装FFmpeg。
(1) 安装EPEL仓库
sudo yum install -y epel-release
(2)下载并安装Nux Dextop仓库的RPM包
sudo rpm --import http://li.nux.ro/download/nux/RPM-GPG-KEY-nux.ro sudo rpm -Uvh http://li.nux.ro/download/nux/dextop/el7/x86_64/nux-dextop-release-0-5.el7.nux.noarch.rpm
(3)更新YUM缓存
sudo yum update -y
(4) 安装FFmpeg
sudo yum install -y ffmpeg ffmpeg-devel
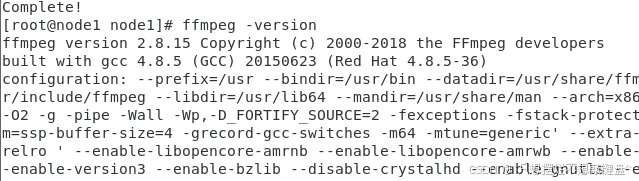
(5)验证安装
ffmpeg -version
2、安装PHP
sudo yum install php php-cli
验证安装
php -v

3、php脚本
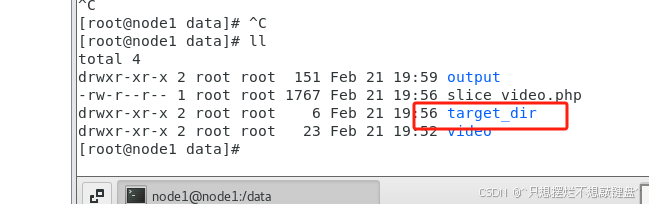
4、创建目录(/data)
视频目录:/data/video
php脚本目录:/data 脚本名称:slice_video.php
5、执行脚本
php slice_video.php
6、生成的切片文件夹
7、安装Nginx
(1)安装
sudo yum install nginx -y
(2)启动 Nginx
sudo systemctl start nginx
sudo systemctl enable nginx
(3) 检查 Nginx 状态
sudo systemctl status nginx
(4)关闭防火墙
sudo systemctl stop firewalld
sudo systemctl disable firewalld
sudo systemctl status firewalld
(5)nginx.conf文件配置
文件位置:/etc/nginx/nginx.conf
sudo nginx -t  # 测试配置文件语法是否正确
sudo systemctl reload nginx  # 重新加载 Nginx使配置生效
user nginx;
worker_processes auto;
error_log /var/log/nginx/error.log;
pid /run/nginx.pid;

include /usr/share/nginx/modules/*.conf;

events {
    worker_connections 1024;
}

http {
    log_format  main  '$remote_addr - $remote_user [$time_local] "$request" '
                      '$status $body_bytes_sent "$http_referer" '
                      '"$http_user_agent" "$http_x_forwarded_for"';

    access_log  /var/log/nginx/access.log  main;

    sendfile            on;
    tcp_nopush          on;
    tcp_nodelay         on;
    keepalive_timeout   65;
    types_hash_max_size 4096;

    include             /etc/nginx/mime.types;
    default_type        application/octet-stream;

    include /etc/nginx/conf.d/*.conf;

    server {
        listen 80;
        server_name 192.168.126.129;

        location /hls/ {
            alias /data/target_dir/; # 替换为你的实际目录路径
            types {
                application/vnd.apple.mpegurl m3u8;
                video/mp2t ts;
         }
            add_header 'Cache-Control' 'no-cache';
            add_header 'Access-Control-Allow-Origin' '*';
        }
    }

}
8、编写html播放器
HLS Stream Player 视频播放器
if(Hls.isSupported()) {
var video = document.getElementById('video');
var hls = new Hls();
// 这里替换为你的.m3u8文件的实际URL
var url = 'http://192.168.126.129/hls/output.m3u8'; // 替换为你的实际URL
hls.loadSource(url);
hls.attachMedia(video);
hls.on(Hls.Events.MANIFEST_PARSED, function() {
video.play();
});
} else if (video.canPlayType('application/vnd.apple.mpegurl')) {
// 如果浏览器直接支持HLS,则可以直接设置src
video.src = 'http://192.168.126.129/hls/output.m3u8'; // 替换为你的实际URL
video.addEventListener('loadedmetadata', function() {
video.play();
});
}
到此这篇关于PHP调用FFmpeg实现视频切片的文章就介绍到这了,更多相关PHP FFmpeg视频切片内容请搜索IT俱乐部以前的文章或继续浏览下面的相关文章希望大家以后多多支持IT俱乐部!

