Redis设置密码有两种方式。
一、Redis设置密码
1. 命令行设置密码
运行Ubuntu,先启动Redis服务端
redis-server
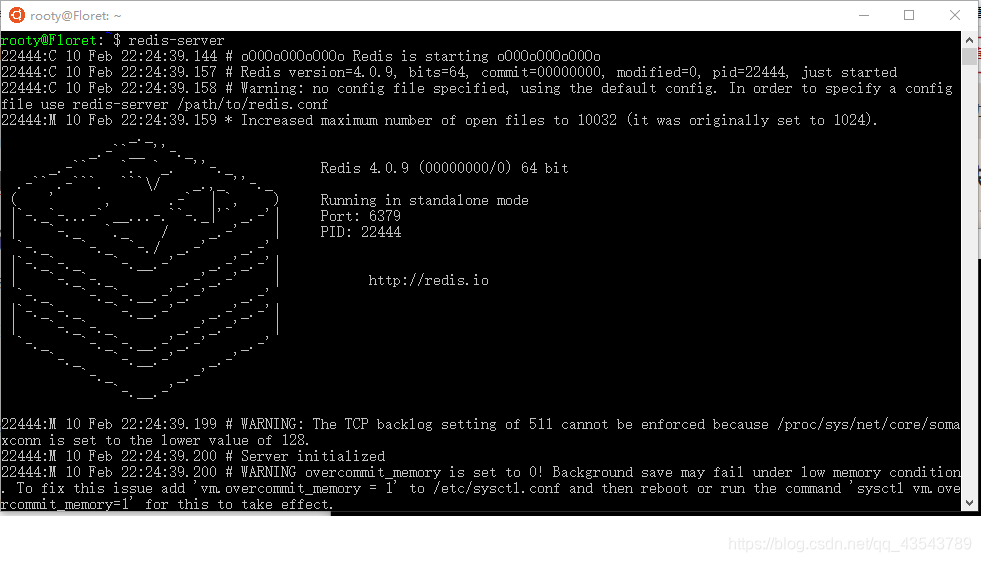
另开一个Ubuntu窗口启动Redis客户端:
redis-cli

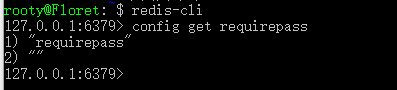
客户端使用config get requirepass命令查看密码:
>config get requirepass
1)"requirepass"
2)""    //默认空
客户端使用config set requirepass yourpassword 命令设置密码
>config set requirepass yourpassword
如示例:设置密码为123456
>config set requirepass 123456
>OK
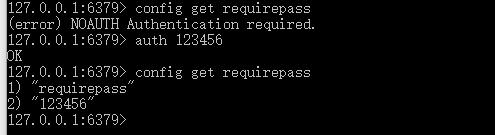
注意:一旦设置密码,必须先验证通过密码,否则所有操作不可用。
操作见如下示例:
>config get requirepass
(error)NOAUTH Authentication required
使用auth password验证密码
>auth 123456
>OK
>config get requirepass
1)"requirepass"
2)"123456"
验证如下图:
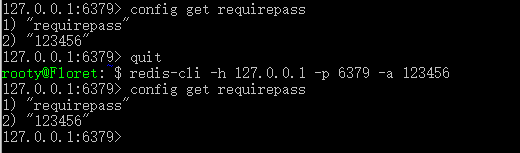
也可以退出重新登录:
>redis-cli -h 127.0.0.1 -p 6379 -a 123456
实例操作如下图所示:
命令行设置的密码在服务重启后失效,所以一般不使用这种方式。
2. 配置文件设置密码
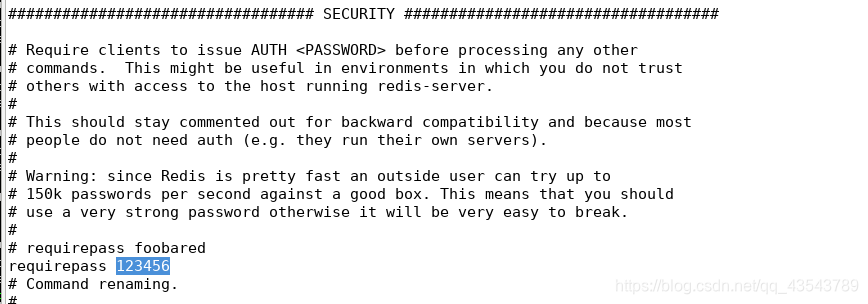
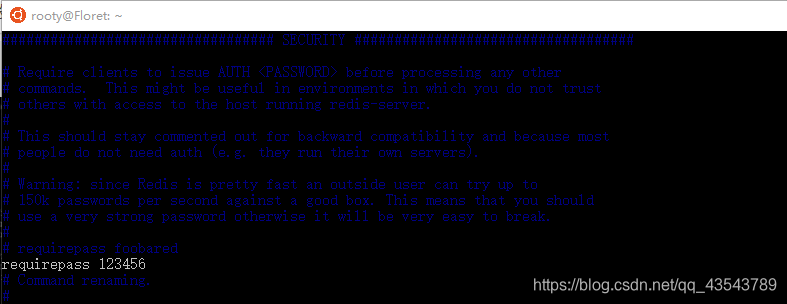
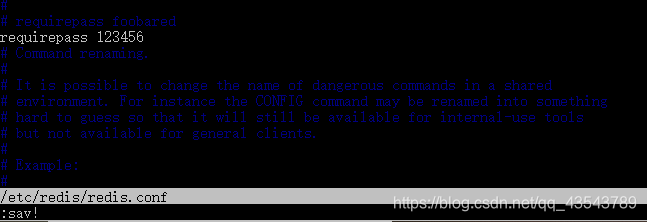
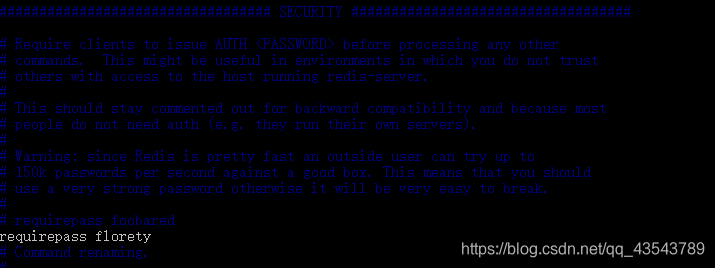
找到redis.conf配置文件,搜索requirepass,找到注释密码行,添加密码如下:
# requirepass foobared
requirepass 123456     //注意,行前不能有空格
重启服务后,客户端重新登录后发现
>config get requirepass
1)"requirepass"
2)""
密码还是空?
关键:虽然修改了.conf文件,但是exe却没有使用这个conf,所以我们需要手动指定一下exe按照修改后的conf运行,就OK了。
所以,这里再一次重启redis服务(指定配置文件)
>redis-server 配置文件路径(如下!十分十分重要!!!)
>redis-server /etc/redis/redis.conf
客户端再重新登录,OK了。

>redis-cli -h 127.0.0.1 -p 6379 -a 123456
>config get requirepass
1)"requirepass"
2)"123456"
话说我最大的跟头就是栽在了这里。 >.
二、遇到问题&解决问题
1.无法打开配置文件
(1)问题描述:
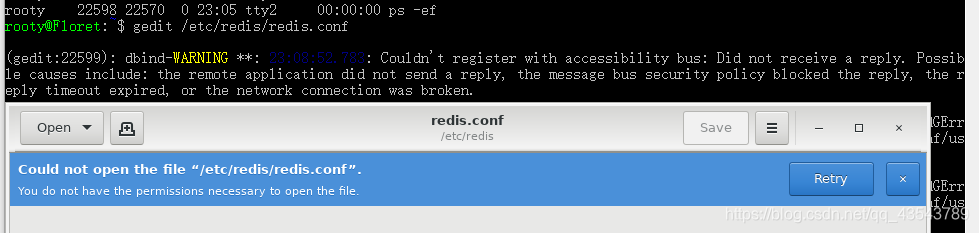
rooty@Floret:~$ gedit /etc/redis/redis.conf

(gedit:22613): dbind-WARNING **: 23:09:28.280: Couldn't register with accessibility bus: Did not receive a reply. Possible causes include: the remote application did not send a reply, the message bus security policy blocked the reply, the reply timeout expired, or the network connection was broken.
(gedit:22613): dconf-WARNING **: 23:09:28.367: failed to commit changes to dconf: GDBus.Error:org.gtk.GDBus.UnmappedGError.Quark._g_2dfile_2derror_2dquark.Code2: Cannot open dconf database: Failed to open file “/home/rooty/.config/dconf/user”: Permission denied
翻译一哈:
(gedit:22613):dbind警告**:23:09:28.280:无法向辅助功能总线注册:未收到答复。可能的原因包括:远程应用程序未发送答复、消息总线安全策略阻止了答复、答复超时已过期或网络连接已断开。
(gedit:22613):dconf警告**:23:09:28.367:未能提交对dconf:GDBus的更改。错误:org.gtk.GDBus.unappedgerror.Quark.u gò2dfileò2derrorò2dquark.Code2:无法打开dconf数据库:未能打开文件“/home/rooty/.config/dconf/user”:权限被拒绝
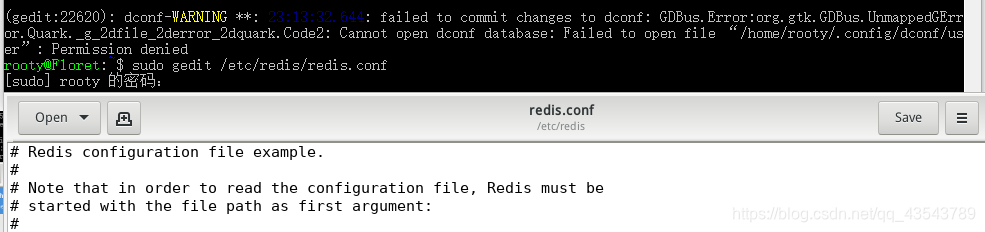
(2)解决办法:
用户权限不够,使用sudo命令输入密码即可:
sudo gedit /etc/redis/redis.conf
2.配置文件密码修改成功点击保存但是却gedit警告
Set document metadata failed
保存之后有警告提示如图:

问题已解决:
ubuntu18.04 gedit警告问题
3.gedit 配置文件修改密码成功但仍CONFIG GET为空
(1)问题描述:如图所示查看配置文件也显示已经修改成功,但是重启服务器后获取密码还是为空。

(2)艰难摸索解决路途小记:
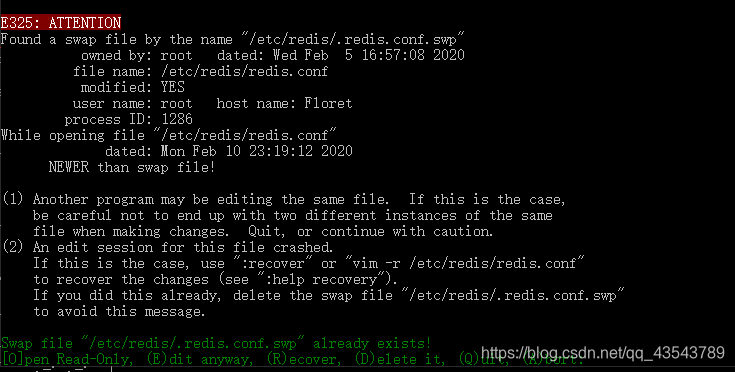
第一次try:(E)无论如何编辑
(修改了但是仍然没有起色。)
第二次try:(D)删除它
(删除后修改但是仍然没有起色。)
问题不在这里,但是这里可以直接选择删除就好,因为没啥影响,你可以在vi再次修改配置文件相关操作,swp文件是之前你操作的中间文件。
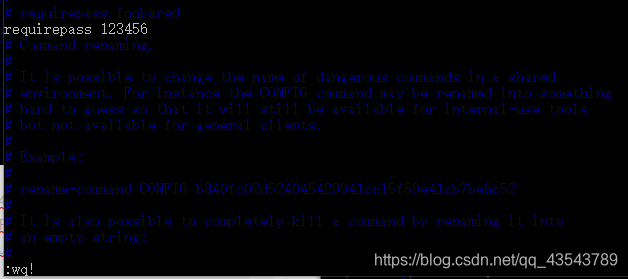
这里成功进入Redis配置文件redis.conf如下图示:
更改了密码后在命令模式下执行 wq! 保存修改并退出。
重启Redis服务:
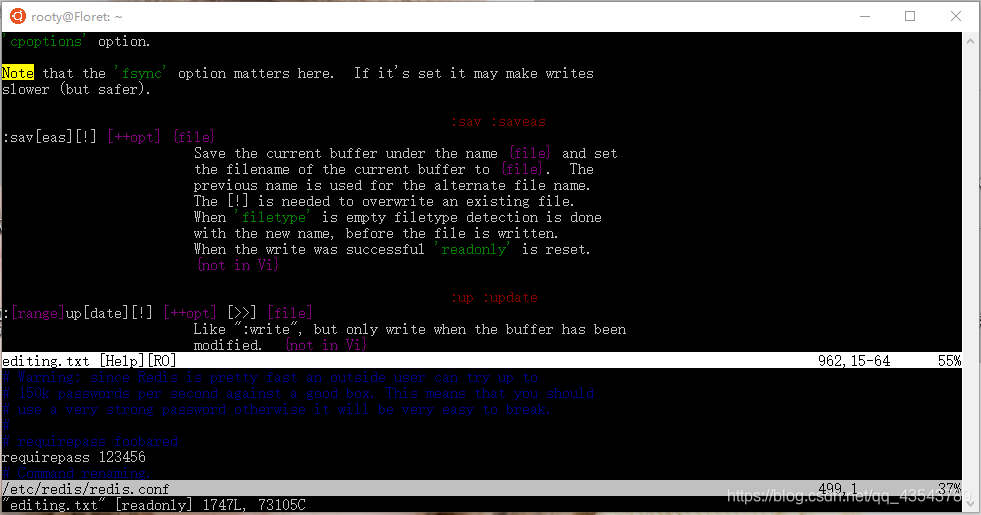
由于迷途摸索,我查阅了help文档 如何覆盖另存文件。
(原来是想把那个现有的swp文件内容覆盖合并到redis.conf。)
问题描述:
'cpoptions' option.

Note that the 'fsync' option matters here.  If it's set it may make writes
slower (but safer).

                                                        :sav :saveas
:sav[eas][!] [++opt] {file}
                        Save the current buffer under the name {file} and set
                        the filename of the current buffer to {file}.  The
                        previous name is used for the alternate file name.
                        The [!] is needed to overwrite an existing file.
                        When 'filetype' is empty filetype detection is done
                        with the new name, before the file is written.
                        When the write was successful 'readonly' is reset.
                        {not in Vi}

                                                        :up :update
:[range]up[date][!] [++opt] [>>] [file]
                        Like ":write", but only write when the buffer has been
                        modified.  {not in Vi}
大概翻译一下:
:sav
:saveas
:sav[eas][!] [++opt] {file}
保存当前缓冲器的名称&文件
                                                         用文件名 {file} 保存当前缓冲区,并设置当前缓冲区的文件名为 {file}。
                                                         前一个名字用作轮换文件名。
                                                         [!] 用以覆盖已存在的文件。
                                                         如果 'filetype' 为空,在写入文件前用新名字进行文件类型检测。
                                                         如果写操作成功,复位 'readonly'。
注意 :The [!] is needed to overwrite an existing file.
这里我是使用了sav! 但是忽略了这个指令必须要有参数(目的文件名)才能执行操作。
( 这里傻傻操作想把那个现有的swp文件内容覆盖合并到redis.conf。如下图 :)
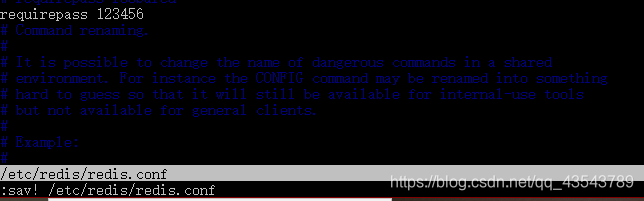
出现错误提示:

没办法覆盖合并小啊呜想直接进行密码操作,发现竟然强制不能进行修改了。哭哭!

如下图实例,最后强制退出结束了这场摸索。(重点要来了!)

(重点来了!!!)
我在没有关闭redis正在运行的服务基础上执行如下命令
sudo redis-server /etc/redis/redis.conf
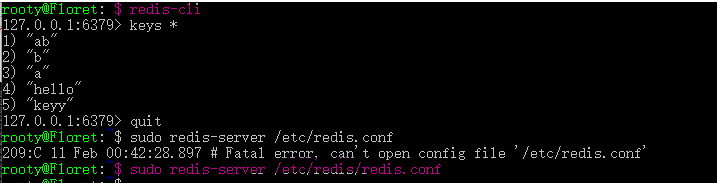
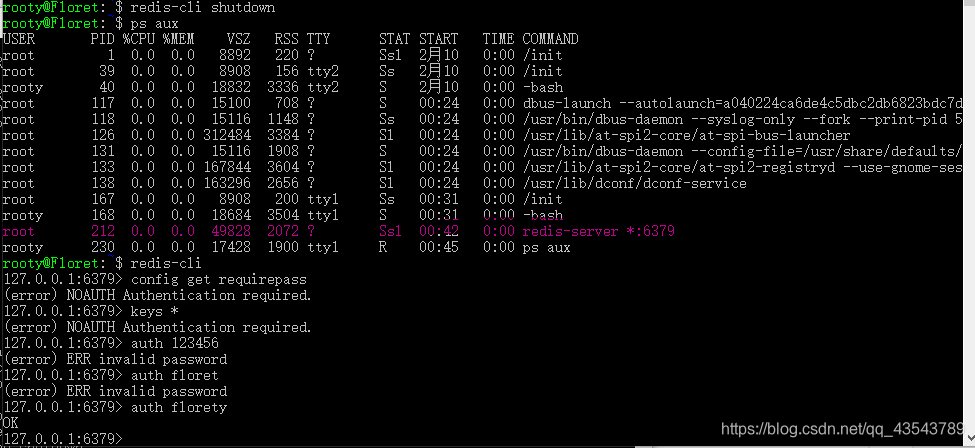
然后习惯性查看进程状态,发现了个我一直忽略的事情:
仔细比对下图圈1和圈2标色的两个redis服务进程。
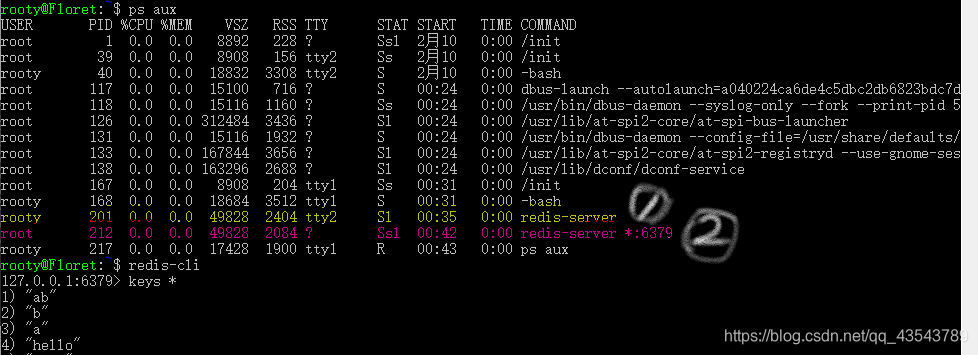
rooty      201  0.0  0.0  49828  2404 tty2     Sl   00:35   0:00 redis-server
root       212  0.1  0.0  49828  2084 ?        Ssl  00:42   0:00 redis-server *:6379
rooty和root表面差别在:redis-server和redis-server *:6379。
因为我小偷懒每次运行Redis服务都不指明配置文件结果造成更改配置文件但是其实是木有使用修改的配置文件。
后续摸索:
(注意:我为了防止原先设置操作密码123456的干扰,后面另启窗口手动修改了配置文件密码为 florety)
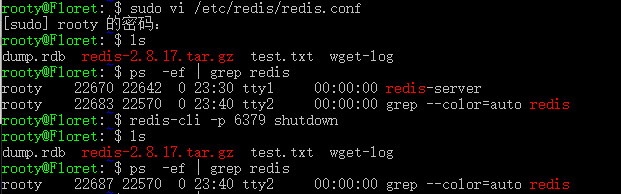
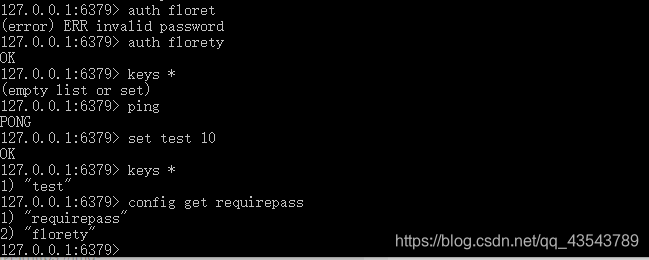
首先关闭了默认配置文件的rooty下的Redis服务。然后进行root下的Redis连接。相关操作如下图:
从例图我们可以看到,这个时候我们之前修改的redis.conf文件才起作用,设置的密码才有效。
密码验证登录试一哈!
Duang! 一切顺利~
终于解决了这个心头大患!
4.注意修改配置文件完成后,一定要重启Redis服务器
如下图可见服务器已经关闭。

总结
以上为个人经验,希望能给大家一个参考,也希望大家多多支持IT俱乐部。

