软件要做一个聊天功能,一般来说是要接入其他的接口,但是因为自己之前听说过没用过WebSocket,所以打算带薪摸鱼,好好的研究一下WebSocket。
一、搭建WebSocket服务器
我软件后端使用的nodejs,所以我们这次也用nodejs来做后端,方便之后的接入
1、搭建服务器
我们先引入ws库和http库,把WebSocket服务搭建起来
const WebSocket = require('ws');
const http = require('http');
const url = require('url');
const server = http.createServer((req, res) => {
    res.writeHead(200);
    res.end('WebSocket server is running.');
});
2、初始化WebSocket服务器
我们需要将WebSocket服务绑定到我们的http服务器上
const wss = new WebSocket.Server({ server });
3、客户映射
使用Map的数据结构来存储以连接的用户及其对应的客户端
const connectedUsers = new Map();
4、事件处理
连接事件
因为我们的聊天是单对单的,而WebSocket是广播(一对多)传输的,所以我们可以使用UserA和UserB的用户名来做成连接,只有UserA和UserB进入此聊天室。
  wss.on('connection', (ws, req) => {
      const query = url.parse(req.url, true).query;
      const userIdA = query.userA;
      const userIdB = query.userB;
      connectedUsers.set(userIdA, ws);
      connectedUsers.set(userIdB, ws);
      // 这里添加其他逻辑,比如我这里是将UserA和UserB从URL里面分离,并且将ID和Web socket客户端关联起来,这里也可以做一下用户认证之类的操作
  });
关闭事件
关闭事件是指的有用户断开连接时,就从映射中移除用户相应的ID
  ws.on('close', () => {
      console.log(`Connection closed for users ${userIdA} and ${userIdB}.`);
      connectedUsers.delete(userIdA);
      connectedUsers.delete(userIdB);
  });
错误事件
这里就是记录了在连接期间发生的任何错误
  ws.on('error', (message) => {
      console.error(`Error occurred for users ${userIdA} and ${userIdB}:`, err);
  });
消息接收
这个事件就是在连接过程中用户在广播中发送的消息,我们将他解析成JSON内容(因为我这里做的单对单,所以数据中包含了sender、receiverID、content,可以使用这种方式来查找接受者,并且将消息广播给接受者)
  ws.on('message', (message) => {
      const dataMessage = message.toString()
      const data = JSON.parse(dataMessage)[0]
      const senderId = data.sender;
      const receiverId = data.receiverID;
      const content = data.content;
      // 广播消息给接收方
      const receiverWs = connectedUsers.get(receiverId);
      if (receiverWs) {
          receiverWs.send(JSON.stringify({ sender: senderId, content, receiver:receiverId }));
      } else {
          console.warn(`Receiver ${receiverId} is not connected.`);
      }
  });
5、WebSocket!启动!
最后,我们只要制定监听端口,启动WebSocket服务器即可
server.listen(3000, () => { console.log('WebSocket server listening on port 3000.'); });
二、前端uniapp应用
我这里使用uniapp制作了一个基础的分屏,左边模拟a用户,右边模拟b用户
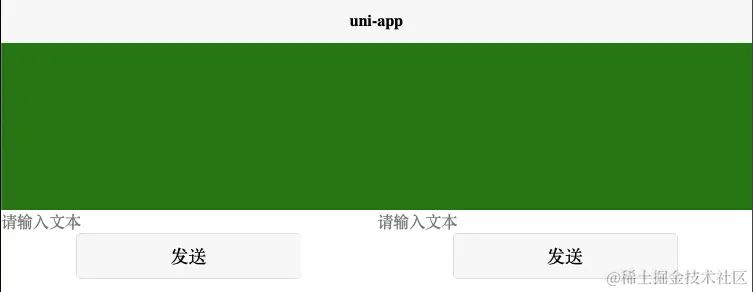
左边使用messageA来存储消息,右边使用messageB来存储消息(其实也可以把他们两个合成一个,但是这里是分屏演示,如果合成一个那么即时通讯的功能就不太显著了)
{{item.sender}}:{{item.content}}{{item.sender}}:{{item.content}}
data() {
    return {
        inputaV: '',//a用户输入
        inputbV: '',//b用户输入
        messagesA:[],//a用户的消息列表
        messagesB: [],//b用户的消息列表
        url: 'ws://127.0.0.1:3000',//使用ws连接连接到webSocket服务器
        socket: null,//socket实例
        userA: 'a',//a用户的id
        userB: 'b',//b用户的id
    }
},
//初始化,在进入软件后便处理url连接,将a用户和b用户的id放入到url连接中(此方法在初始化页面的时候就要进行调用)
//并且在两个用户连接到服务器中绑定消息的回调函数,使得有任意一个用户发送消息之后都会接受到消息
enter() {
    let url = `${this.url}?userA=${this.userA}&userB=${this.userB}`;
    this.connect(url);
    uni.onSocketMessage(this.onSocketMessage()); // 绑定消息接收回调
},
//连接方法,此方法是在用户在进入页面中就调用的,让两个用户连接到websocket服务器中
connect(url) {
    this.socket = uni.connectSocket({
        url,
        success() {
            console.log('WebSocket连接成功');
            uni.onSocketOpen(() => {
                console.log('WebSocket连接已打开!');
            });
        },
        fail(err) {
            console.error('WebSocket连接失败', err);
        }
    });
},
//用户a发送消息的事件
sumA() {
    if (this.socket) {
        //将消息中带上发出人,接收人,确保信息无误
        this.messagesA.push({
            sender: this.userA,
            content: this.inputaV,
            receiverID: this.userB
	})
        let data = JSON.stringify(this.messagesA)
        uni.sendSocketMessage({
            data
        });
        this.inputaV = ''
    } else {
	console.log('连接失败');
    }
},
//用户b发送消息的事件
sumB() {
    if (this.socket) {
        this.messagesA.push({
            sender: this.userB,
            content: this.inputbV,
            receiverID: this.userA
        })
	let data = JSON.stringify(this.messagesA)
	uni.sendSocketMessage({
            data
        });
	this.inputbV = ''
    } else {
        console.log('连接失败');
    }
},
//获取消息事件,在任意用户发送消息之后,前端可以监听到消息的接受,我们只需要将数据进行处理即可
//因为用户的显示是用的messageA/messageB,所以我们可以通过不同的接收人来对不同的数据进行处理
onSocketMessage(res) {
    let data = JSON.parse(res.data)
    let sender = data.sender
    let content = data.content
    let receiver = data.receiver
    if(receiver == this.userA){
        this.messagesA.push({
            sender,
            content,
            receiverID
	})
    }else if(receiver == this.userB){
	this.messagesB.push({
            sender,
            content,
            receiverID
        })
    }
},
总结
到此基础的一个websocket服务器的搭建和使用就完成了,WebSocket对于后端的要求和对于前后端的紧密联系都是十分重要的,本文只是一个小的实验和想法,如果有不对的地方请指正
以上就是JavaScript WebSocket实现实时双向聊天的详细内容,更多关于JavaScript WebSocket双向聊天的资料请关注IT俱乐部其它相关文章!

