vue3 RouterView插槽和过渡动效
RotuerView 组件暴露了一个插槽,可以用来渲染路由组件:
//代码等价于不带插槽的
RotuerView 结合KeepAlive & Transition
//1、保持路由组件活跃


//2、路由组件之间切换时实现过渡效果


//3、持路由组件活跃和实现过渡效果
过渡动效
//1、路径组件上使用转场
//这会对所有的路由使用相同的过渡


//2、在路由对象的meta属性上传参,结合插槽传参使用
const routes = [
  {
    path: '/custom-transition',
    component: PanelLeft,
    meta: { transition: 'slide-left' },
  },
  {
    path: '/other-transition',
    component: PanelRight,
    meta: { transition: 'slide-right' },
  },
]


//3、结合router.afterEach导航守卫,修改route.meta.transition的值
router.afterEach((to, from) => {
  const toDepth = to.path.split('/').length
  const fromDepth = from.path.split('/').length
  to.meta.transition = toDepth
强制在复用的视图之间进行过渡–(添加一个 key 属性来强制过渡)
Vue 可能会自动复用看起来相似的组件,从而忽略了任何过渡,添加一个 key 属性解决。
vue3中的插槽使用
vue插槽分三种,默认插槽、具名插槽和作用域插槽,实现在同一个组件中填充不同的内容,项目中也经常会遇到,自己写的可以复用的组件中,经常会用到前2种,而UI组件库中经常会用到作用域插槽,记录一下用法
一、默认插槽
想要实现以下效果:
以下代码是在Markdown中纯手写,没有验证,也没有检查语法,只记录关键内容
一般默认插槽只有一个
- 父组件:
import {ref} from 'vue' import Category from '@/src/components/Category.vue' const games = [ {id: 1, name: '英雄联盟'}, {id: 2, name: '王者荣耀'}, {id: 3, name: '红色警戒'}, {id: 4, name: '斗罗大陆'}, ] let imgUrl = ref('https://z1.ax1x.com/2023/11/19/piNxLo4.jpg') let videoUrl = ref('http://clips.vorwaerts-gmbh.de/big_buck_bunny.mp4') .content { display: flex; justify-content: space-evenly; } img,video { width: 100%; }
- {{ g.name }}
![]()
- 子组件:
import {ref} from 'vue' import Category from '@/src/components/Category.vue' const games = [ {id: 1, name: '英雄联盟'}, {id: 2, name: '王者荣耀'}, {id: 3, name: '红色警戒'}, {id: 4, name: '斗罗大陆'}, ] defineProps(['title']) .item { height: 200px; width: 200px; border-radius: 10px; box-shadow: 0 0 10px; padding: 10px; backgroud-color: skyblue; .title { width: 100%; font-size: 20px; line-height: 20px; text-align: center; backgroud-color: orange; } }{{ title }}>
默认插槽相对简单,只用在子组件中写上,父组件在对应的地方补充想要写的内容即可,加上适当的样式,就可以呈现图片所示的效果了
此外,默认插槽其实有名字,它的名字是#default
二、具名插槽
具名插槽就是给默认插槽加上名字(name),父组件使用的时候加上v-slot:name,或者使用语法糖#name,这样可以让插槽的作用更具体,同时可以写多个插槽
- 父组件:
import Category from './Category.vue' import { ref,reactive } from "vue"; let games = reactive([ {id:'asgytdfats01',name:'英雄联盟'}, {id:'asgytdfats02',name:'王者农药'}, {id:'asgytdfats03',name:'红色警戒'}, {id:'asgytdfats04',name:'斗罗大陆'} ]) let imgUrl = ref('https://z1.ax1x.com/2023/11/19/piNxLo4.jpg') let videoUrl = ref('http://clips.vorwaerts-gmbh.de/big_buck_bunny.mp4') .father { background-color: rgb(165, 164, 164); padding: 20px; border-radius: 10px; } .content { display: flex; justify-content: space-evenly; } img,video { width: 100%; } h2 { background-color: orange; text-align: center; font-size: 20px; font-weight: 800; }父组件
- {{ g.name }}
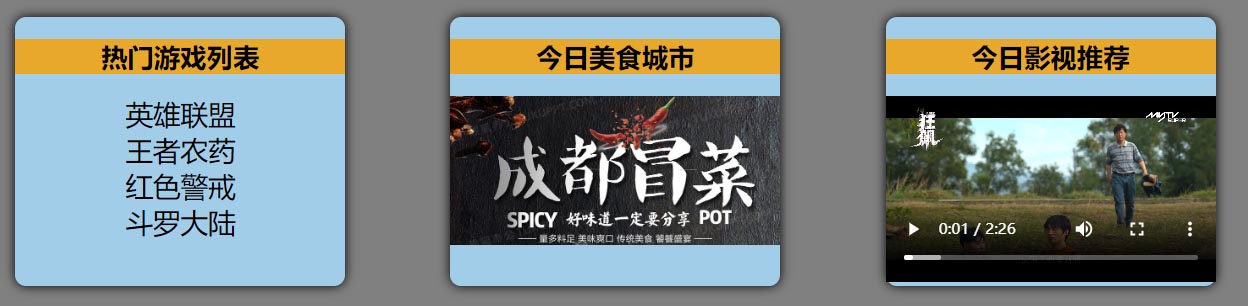
热门游戏列表
今日美食城市
今日影视推荐
- 子组件:
默认内容1默认内容2.category { background-color: skyblue; border-radius: 10px; box-shadow: 0 0 10px; padding: 10px; width: 200px; height: 300px; }
子组件定义了两个具名插槽,分别是s1和s2,父组件在需要写插槽的地方,用v-slot:s(或者#s)来声明这个插槽的位置,即可实现一个子组件中定义多个插槽,而且在父组件中,具名插槽的位置是任意的,不受写的位置的影响,只收子组件中位置的影响
三、作用域插槽
前面可以看到,不管是默认插槽,还是具名插槽,都用在数据父组件给,组件结构子组件给,也就是用父组件的数据去填子组件的结构,在部分特定的情况下,子组件没有向父组件提供数据,但又需要使用插槽,这种情况在UI组件库中非常常见,这样就需要使用作用域插槽了
- 父组件:
import Game from './Game.vue' .father { background-color: rgb(165, 164, 164); padding: 20px; border-radius: 10px; } .content { display: flex; justify-content: space-evenly; } img,video { width: 100%; }父组件
- {{ y.name }}
- {{ item.name }}
{{ g.name }}
父组件只提供了结构,但是要注意,它使用了v-slot=”params”来接收子组件传递的数据
- 子组件Game.vue
import {reactive} from 'vue' let games = reactive([ {id:'asgytdfats01',name:'英雄联盟'}, {id:'asgytdfats02',name:'王者农药'}, {id:'asgytdfats03',name:'红色警戒'}, {id:'asgytdfats04',name:'斗罗大陆'} ]) .game { width: 200px; height: 300px; background-color: skyblue; border-radius: 10px; box-shadow: 0 0 10px; } h2 { background-color: orange; text-align: center; font-size: 20px; font-weight: 800; }游戏列表
子组件通过自定义属性的方式,在插槽中传递了youxi这个响应式的数据,以及两个固定的值x和y
父组件中,通过v-slot=”params”接收到的params就是由下面这么个对象:
{
    youxi: [...],
    x: '哈哈',
    y: '你好'
}
子组件没有对插槽命名,所以可以用#default来具名插槽,同时,因为params是对象,也可以使用{youxi}这种方式来解构
这里的作用域插槽虽然写的不是UI组件,但却实现了父组件使用子组件传递过来的数据渲染不同的文档结构
总结
以上为个人经验,希望能给大家一个参考,也希望大家多多支持IT俱乐部。

